Showing posts with label objects. Show all posts

Saturday, July 7, 2012

Continuing to Objects...

Although the Bloom 2 Bar Project is officially completed, I thought I might continue the occasional posting here that would relate directly to the work of the project. 

I really wanted at least *something* new for the Goderich Celtic Festival, and Summerfolk the weekend following (Only three clear days between them, and there is an offload and re-pack in there too.)

The ideal would be to have something as completed objects that represented the three months I spent on the Bloom To Bar project:


Starting billets - bloom iron with spring steel cores
Rough forged blade blanks
I had prepared two billets I intended to lead to a very specific bladesmithing design. The top one is iron from Slag Pit 2 ( # 49 , November 2011 ) an the bottom from Black Rock (# 14, February 2006 ) In both cases the iron was deliberately used before much welding and folding had been done, specifically to allow cracks and irregular edges. I actually had gone a bit *too* far on the Slag Pit 2 iron, ending up with most all the flaws removed. For the second attempt, I was able to restrain my natural desire to forge in all the imperfections.

In the lower image, the two blanks are at different stages in completion.
The top blade has had the blade profile roughed out, and the first pass on forging the edge completed. The hilt is only vaguely shaped at this point however.
The bottom blade is complete in its forging. I had ground the rough forging to the basic lines I wanted for the finished knife. I find it easier to check for warps and wobbles if I do this first. Then the blade was forged again, first to correct any irregularities, second to refine the edge. (Forge thin - grind thinner). It is now ready to be surface ground, then the finished surface to be created on the belt sanders. Then heat treated. Then finish polishing. (The actual forging out of the knife shape is by far the fastest part of the whole process!)

Stay tuned for images of the completed knives...

(Edited from a longer post on Hammered Out Bits.) 

Saturday, April 21, 2012

Sometimes a great (?) notion...

(Day 58 continued)

For the last week in the forge I have been working to prepare materials with a specific object in mind.
Generally this is *not* how I have been proceeding with the project. As I do feel I still have a lot to learn about how best to approach compacting down each individual bloom. I still don't really feel confident that I can pick up a given bloom - then absolutely undertake the best possible method to produce a determined result at bar stage. There is no doubt that all this bloom to bar work is greatly increasing my skills, but...

I had three possible objects in the back of my head to create as part of this project. All three incorporate blown glass. Working with a 'raw' piece of bloom iron creates texture, an irregular outline and considerable strength.
Forged Bloom Bowl
I've always loved blown glass. It offers colour, transparency, and smooth fluid lines. The counterpoint to forged metals is obvious.

So this is the concept :
Rough for 'Fluid Core'
This most certainly is one of those times where my illustration ability falls so very short of being able to adequately picture the concept.
For 'Fluid Core', three pieces of forged bloom iron would be joined to create a tall tripod like shape. The surfaces would be roughly polished, as seen in the bloom bowl above. This creates surfaces that are both flat and shiny, but also darkly pock marked. The ragged edges from the original bloom are left in place as much a possible. Part of the technical challenge is compacting the parent bloom mass enough to be structurally solid, but not welding / folding so much as to blend in all the cracked edges.
The glass would be formed in place over the metal. On the lower surface, it would be allowed to slump down to form three lobes between the metal plates I'm envisioning the top of the glass as a long oval form.

These are the individual plates I have forged up to use for this object :
Bloom iron plates
All three pieces are forged down from the 'Slag Pit 2' bloom (# 49 - November 2011) The starting bloom mass was 4650 gm. It was the first piece that I worked under the new hydraulic press, first cutting it into four more manageable sections. (The fourth piece, smaller and more fragmented, was forged up into a working bar.)
You can see how I have drawn the individual segments into long thin plates. The next step will be shaping these into more of a triangular profile. I still have not decided if I will simply MIG weld the plates together, or make a separate cylindrical core to serve as the attachment piece.

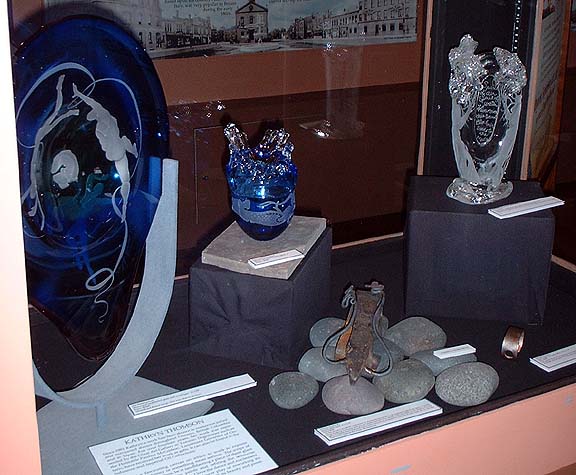
I have already spoken to local glass artist Kathryn Thompson about co-producing this  piece (and possibly two others). I have been a huge fan of Kathryn's work since I first met her. (Kathryn was one of the contributing artists for 'Out of the Fiery Furnace' in 2005). Other than showing her my rough concept, I intend on letting her determine how best the glass work should be undertaken.

I will be using some of the OAC grand funding to directly commission this glass work from Kathryn. (Another positive effect of the grant!)


Tuesday, March 6, 2012

You Can't Always Get...

...what you WANT
(But if you try some times...)

(Day 20)

This is a look at what happened yesterday in the forge.
If you check back to yesterday's posting. You will see that the concept I had come up with was to take one of the smaller, more compact looking blooms and layer it up on to a carbon steel core. The intent was to preserve the ragged edge into the finished object.


The bloom I chose for this was the one from Smelt 14 - at Dan Nickel's 'Folly at the Forge' event. (Black Rock Forge - Traverse City MI, February 2006. The story of that smelt is an interesting tale of endurance, it was 20 bellow F when we started!) The piece was a fragment at 485 gm off a much larger bloom. As we had forged down the full bloom to bars at the event, I knew the material was a 'nice workable iron' (from my notes).

As it was about fist size to start, it easily fit inside my two burner propane forge to pre-heat. This allowed me to bring the core up to temperature more slowly. Also allowed this process to take place while I was getting my main coal forge set up and started. All the actual forge work was done in the hotter coal fire.
(Note that I have altered this image in an attempt to get it closer to the actual colours you would have seen. The camera 'sees' down into the infra-red differently than the human eye does. The actual colour would have been a 'bright orange'.)
This is the end result of the initial flattening stage. I worked the raw bloom starting at a welding heat. I took two heats working with the hand hammer, concentrating mainly on the flatter of the rectangular sides. Then I took several heats on the air hammer, again starting with welding each time. The action there was primarily to draw the rectangle down to a wide and thin flat bar.
Here you can see the results after being cooled and cut into two fairly equal pieces. The loss from bloom to this stage (as you can see) was down to 394 gms

Thats a total loss of 91 gm, or about 20%.
The metal at this point still had some fissures in it, especially along one edge. If I was really trying to make a solid working bar, I would have collapsed the bloom into a square cross section, allowing me to work all four of the edge surfaces (instead of just concentrating on two). I would have undertook at least one more weld series. My estimate is that the total loss would have been closer to 25 %


The two bloom iron plates were roughly 1 3/4 inch wide x 3 3/4 long x 1/4 thick. I took a piece of standard 1045 middle carbon spring steel (new leaf spring) and placed it as a core. A working handle was MIG welded to the spring. I then tack welded the three pieces together at the far end. You can see that the central cut end of the bloom plates was placed at the far end.
(I normally wire together my starting layers. Also I like to weld from the far end back towards my body. Just habits!)
At this point there was a total of 643 gms of material, the stack was roughly 3/4 inch thick.You can see that the spring was a bit wider, at 1 3/4 inch. I left the plates all even on the 'cleaner' edge of the bloom pieces. (Remember a ragged effect was my initial goal.)


The finished result.
This billet is roughly 8 inches long (with the more or less pointed end) x 1 3/4 at the base x 3/8 thick. I have given it a fast surface clean on the high speed sander. Although there are certain to be some flaw lines, generally the surfaces are welded fairly tight.

Although this billet will certainly work up into a potentially quite nice blade, it is not quite 'what I need'.

Back to the pile for another attempt...

Monday, March 5, 2012

Object Ideas - (2)

(Day 19)

With the power of the hydraulic press still a couple of days from securing, I will be starting with some of the smaller blooms / bloom fragments. Those are small enough to work with hand power - or under the smaller die size of my air hammer.

I was thinking of something that would both serve as a warm up towards the larger scale work to come, plus would yield up an interesting object. Another advantage of a smaller scale is that I will be able to work in my existing bottom draft forge. (Later I expect I will have to convert this over to a larger scale, side draft arrangement.)

The answer I decided upon was blade work:


The overall lines of these possible pieces actually comes from Bronze Age Greece. The artifacts are small one piece general purpose knives, with blades about 4 inches long. In terms of the profile, I thought to change the proportions to create a very wide and stubby blade, but retain the sweeping curves. This is a general profile I have worked with many times before - and have had great results.

The concept is to take one of the smaller bloom fragments, perhaps one of the cut sections. That would give me a piece with one more or less flat, and relatively dense surface. This I would flatten slightly, then cut in two down the centre of the flat side. The result of this should be two pieces, each of which will have a wide flat side plus a relatively flat edge. The opposite edge should retain the irregular surface originally on the outside of the bloom.

These two slabs would then be welded on to a separate core piece of a middle carbon spring steel, a bit wider than the bloom pieces. If the correct sizes are matched, what should result is one more or less 'clean and tight' edge, and one ragged edge. The two surfaces of the block would be hard and dense along one side, but become irregular to the other side.

This I would then forge up into the finished blade profile.
On polishing, what should result is a hard and even bottom edge. When ground, the bevel shape created will expose the harder carbon steel core for the cutting blade. Along the back, the material should appear pitted and irregular - a feature from the bloom iron source of the material.

Stay tuned to see what becomes of this grand concept...


The equipment preparation part of this project is dragging on longer than I had hoped. The new dies for the hydraulic press are ready, but there is one last bit of the conversion of that piece of equipment that needs to be finished. It is powered by a gasoline engine, and with the modifications, right now the exhaust blows straight back on to the operator. Although I have run it a couple of short sessions just to ensure everything is working, I really can not work seriously with the blooms on this machine until I install some venting. I need to purchase some metal hosing for this purpose, hopefully over the next couple of days. Sometimes rural living really slows down sourcing any 'unusual' parts or supplies purchases. (Big joke around here is "What are you using it for - this time?")

Wednesday, February 29, 2012

Why Bloom Iron ?- five

(Day 17)

The second distinctive characteristic of bloomery iron is variation in carbon content.

(This is going to be a bit technical for the non-metalsmiths.)

Carbon has a major effect on iron when it is added (alloyed) to the metal. Even small amounts of carbon drastically effect the relative resistance to deforming (effectively the hardness). Some modern metals with their approximate carbon contents:
'Electric Iron' ( a low carbon Bessemer steel, used for transformer cores) - about 0.05 % Carbon
Mild steel (what most everything is made of, from cars to I beams) - about 0.2 % Carbon
Spring steel (old leaf and coil springs in autos, heavy cutting tools) - about 0.5 % Carbon
Tool steel (small, sharp cutting edges) - about 1.0 % Carbon
Cast Iron (cookware, stoves) - about 2.0 % Carbon

Because iron alloyed with carbon resists forming - it will get increasingly more difficult to actually forge (hot hammer) shapes. In the pre-Industrial Age world, the ideal iron for the blacksmith had as *little* carbon in it as possible.
You can see that this works in direct opposition to the requirements of the blade maker. For a durable cutting edge, you would want some amount of carbon present. Hardness equals edge holding ability. Also the complex series of heat treating methods apply to Carbon alloys. (A topic for *much* later!)


Remember our idealized direct process bloomery furnace:

Carbon is *not* present in the starting iron oxide ore.
Carbon may be absorbed by the reduced metallic iron in two ways:
First, directly to the surface of the individual particles as they fall down the body of the furnace. This is most commonly found with very small particle size ore, or with a furnace that is allowed to run too hot.

The second place carbon can come from is into the surface of the bloom, as it sits inside the liquid slag in the bowl at the bottom of the furnace. This is a slower process, so the carbon tends to diffuse from the outer layers towards the centre.
With larger blooms, the effective ratio of surface area to internal volume is lower. So this carbon variation effect tends to be more obvious with smaller blooms.
Also, the quality of the individual bloom comes into play. The folding and re-welding process will tend to 'average out' variations in carbon content ('carbon migration'). There can also be carbon absorbed from the fuel during repeated welding heats.

Ok - enough theory - what is the practical effect:

Bloom Buckle - Winter 2011
Forged from a small bloom fragment

The variation in colours seen over the surface of 'Bloom Buckle' is a direct result of variations in carbon content within the metal. As a small fragment, the original metal was more drastically effected by carbon diffusion across its surface (high area to volume ratio).
The finished buckle was water hardened, then etched with a Ferric Chloride solution to highlight the differences in carbon content. (This is a variation on the process used for my layered steel knives.)

This is another effect which I intend on exploring (if time permits) within the framework of the OAC Grant.


Note to Readers :
The Arts is well known for its (often inpennetrable ) jargon. You may have noticed I don't tent to use this 'Language of the Artist'. What you will find here is a tendency to technical jargon - itself often poorly understood (and frequently *improperly* used). I would refer you to my commentary piece 'Defining the Artist Blacksmith'.

Monday, February 27, 2012

Haliburton Sculpture Forest Submission

(Day 12)

Currently there is an open call underway for a new work for the Haliburton Sculpture Forest :
" The Board of the Haliburton Sculpture Forest announces a competition for a new
sculpture for the Haliburton Sculpture Forest in Glebe Park near the village of
Haliburton, Ontario.

The Haliburton Sculpture Forest is looking for a work of artistic/design excellence
and durability that suits the natural attributes of the Haliburton Sculpture Forest and
addresses the theme “Avian Fauna” (birds of the region)
...
Proposed sculptures can be representative of specific birds of the Highlands or can
be a work that brings the image of birds to the eye of the viewer.

The sculpture will be located in the Sculpture Forest along walking/cross country
skiing trails adjacent to the campus of Fleming College and the Haliburton School
of The Arts. The trails are used by thousands of walkers and skiers throughout the
year. The Sculpture Forest was started in 2001 and currently has 25 sculptures by
Canadian artists."
Although I have known about this competition for about six weeks, I really had a bit of trouble coming up with a suitable concept for a new work. In connection with my Crafts Project, I did want to use bloom iron as a major component. This is what I came up with:

Title: 'If You Build It - they will come'
Form: bird bath / feeder


Concepts:

Almost any sculpture providing the required durability and longevity for the Haliburton Sculpture Forest needs to be rigid in its construction. How to add movement to such an enduring form? My solution is to attract natural life itself into the sculptural framework. 'If you build it' thus entices the birds themselves to become an ever changing dynamic component of the work.

Gold Finch perched on my 'Glass Disk Hanger'

The central bowl is a irregular shape created from bloomery iron. The Near North region is covered with deposits of naturally occurring bog iron ore deposits. In the Settlement Period (1800's) these deposits were sources to the first iron industries in Ontario, the Marmarra Iron Works a prime example. Thus the primary material of sculpture is related directly to the Region.

Bloomery iron has a distinctive texture and visual appearance quite unlike our modern metals. I am the only artist in Ontario who creates and works with bloomery iron. Bloom iron, due to its low carbon content, will weather slower than modern mild steel. As it does oxidize, the slag occlusions this metal contains will cause it to weather in unusual patterns.
The shallow bowl becomes a natural bird bath, filled passively by rain. It also could be used as a feeder in winter months, attracting wild life.


Bowl forged from Bloom Iron - 2011

The bowl at the heart of the sculpture is held up in a loose basket made of intertwined organic elements. Forged of stainless steel, these pieces will have a light grey colour, contrasting sharply with the dull black of the lower bowl. The uprights are stylized interpretations of two common Ontario road side plants. To one side will be a bundle of gracefully tapering rushes. To the other are a spray of my distinctive 'feather' forms, which are inspired by the reed Phragmites. Balanced against each other, the native plant and the invasive species. Who can say which is more 'natural'?

'Fire at Heart', 2oo8
Use of the 'Feather' element

The base frame of the sculpture will be covered with a loose spray of natural beach stones - gathered from the Region. First are oval, wave polished stones from the Lake Huron shore (Goderich area). The second are fragments of pock marked limestone from Manitoulin Island. If possible, some pieces of the dramatically folded granite from East Georgian Bay would be included.


Manitoulin Limestone - as sculpture base ('Crinoids' - 2012)

Size / Scale

In keeping with the four seasons use of the Sculpture Forest, 'If you build it' is scaled to retain a physical presence even with three feet of snow ground cover. The sculpture has an overall height of about seven feet. The area the sculpture occupies is an irregular oval about 3 1/2 by 3 feet.

The central bowl is an irregular oval shape overall, roughly 18 to 24 inches in diameter, about 6 inches deep. The top edge of this bowl will sit at roughly four feet off the ground.
As well as clearing the snow cover, this placement allows the rough textured lower / outer surface of the bowl to be easily viewed as the observer approaches - through the bulk of the seasons.
The inner surface of the bowl will be ground smooth. Initially this will make a bright surface, which will oxidize differently than the outer surface as time goes by. This difference becomes a visual discovery for the viewer as they approach closely.

The individual curved organic elements vary in height. The top of the lowest will sit at roughly five feet from ground level, extending to closer to seven feet for the tallest. The graceful curves sweep the terminal points inwards, providing a measure of safety. The 'feather' elements will be about 2 - 3 inches wide. The 'rushes' will be about 1 1/2 inches diameter at their widest.

What is above is only an excerpt from the larger detailed description prepared for the submission. If any reading are interested, the total time taken for the layout drawing, researching the costs and preparing the supporting documentation was roughly 10 hours. (If you're wondering where the time goes...)

Image 'Bird on Disk' by Karen Peterson

February 15 - May 15, 2012 : Supported by a Crafts Projects - Creation and Development Grant

COPYRIGHT NOTICE - All posted text and images @ Darrell Markewitz.
No duplication, in whole or in part, is permitted without the author's expressed written permission.
For a detailed copyright statement : go HERE