Showing posts with label blacksmithing. Show all posts

Saturday, July 7, 2012

Continuing to Objects...

Although the Bloom 2 Bar Project is officially completed, I thought I might continue the occasional posting here that would relate directly to the work of the project. 

I really wanted at least *something* new for the Goderich Celtic Festival, and Summerfolk the weekend following (Only three clear days between them, and there is an offload and re-pack in there too.)

The ideal would be to have something as completed objects that represented the three months I spent on the Bloom To Bar project:


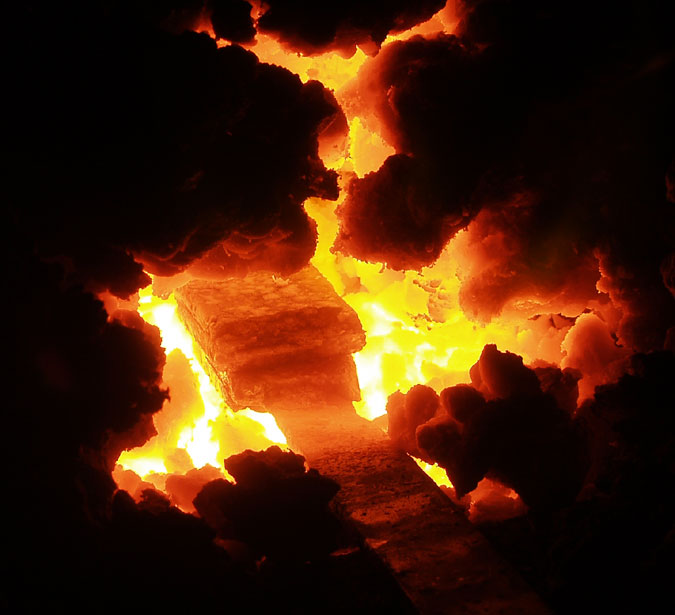
Starting billets - bloom iron with spring steel cores
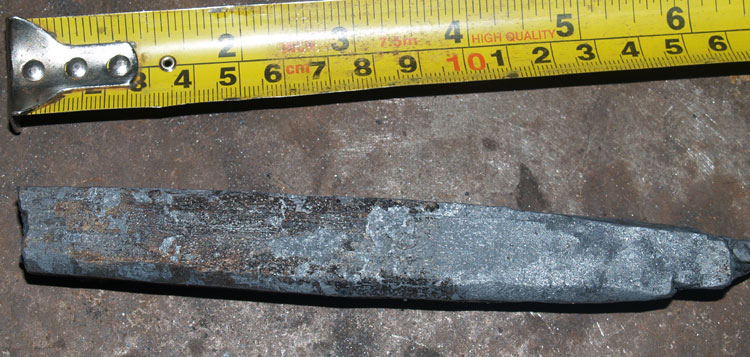
Rough forged blade blanks
I had prepared two billets I intended to lead to a very specific bladesmithing design. The top one is iron from Slag Pit 2 ( # 49 , November 2011 ) an the bottom from Black Rock (# 14, February 2006 ) In both cases the iron was deliberately used before much welding and folding had been done, specifically to allow cracks and irregular edges. I actually had gone a bit *too* far on the Slag Pit 2 iron, ending up with most all the flaws removed. For the second attempt, I was able to restrain my natural desire to forge in all the imperfections.

In the lower image, the two blanks are at different stages in completion.
The top blade has had the blade profile roughed out, and the first pass on forging the edge completed. The hilt is only vaguely shaped at this point however.
The bottom blade is complete in its forging. I had ground the rough forging to the basic lines I wanted for the finished knife. I find it easier to check for warps and wobbles if I do this first. Then the blade was forged again, first to correct any irregularities, second to refine the edge. (Forge thin - grind thinner). It is now ready to be surface ground, then the finished surface to be created on the belt sanders. Then heat treated. Then finish polishing. (The actual forging out of the knife shape is by far the fastest part of the whole process!)

Stay tuned for images of the completed knives...

(Edited from a longer post on Hammered Out Bits.) 

Thursday, May 24, 2012

Forging 'the custard'


 Edited from my ongoing on  Don Fogg's Bladesmithing Forum

Darrel so when you say 'weld in all the edges'... do you mean basically turning it on it's side and hammering down all the little bits at welding heat?   I'm assuming this is easier with lower carbon steel and iron.  On my very high carbon stuff.. those little bits just fall off.  
Scott

I would most certainly *not* hold my working methods up as the ideal!

That being said, I'm just coming off a two month research / learning project called 'Bloom to Bar'. So for while there all I was doing in the shop was working up some of my big pile of blooms (!)
So, that being said, take a look at :
'A Typical Work Session' (earlier on Bloom 2 Bar)

Jesus Hernandez also has a good visual tutorial over on his web site.


I have also seen on this forum some good advice given by Lee Sauder on this same topic.

Blooms have a structure that Lee describes as 'like a custard' - think of a lemon meringue, turned upside down.
The centre is a hard 'nut' of iron, often quite dense, with a spongy layer, often with a lot of air spaces and more slag included around the outside. As you might guess, a larger bloom might be cut apart, so more like a wedge of pie than the whole thing like you see on a small bloom.

(There is a variation in carbon content within a single bloom as well. Lets just leave that one. If anything, this carbon variation exaggerates the effects.)

Of course, the two different densities of metal move at different rates. That's one reason a press, squeezing in one direction does work more effectively than hand tools. The raw size of the mass also works against anyone attempting this process working alone. With excellent skill and co-ordination between a master hand and striker, of course the compaction process can be carried out by hand. (Watch Lee and Mike McCarthy work some time!)

So your first step is just pressing downwards at welding heat, collapsing the air spaces of the outside 'meringue' and forcing them on to the hard nut in the centre.
This does help on the edges however, which remain ragged. I have had some luck placing the then flat disk on its edge and pressing in / down. Its a tall thin shape, with soft edges, so the press tends to slide it sideways and I certainly find that process hard to control. Also the press works in a flat plane, and most often the bloom disk is round or oval.

Taken together, I had found it just as effective to hand hammer the edges in. I would place the disk flat on the anvil, then lean way over so I can fire blows almost dead horizontal from the far side of the anvil back towards the disk and my tong hand. This also allows you to both heat and forge on section of the bloom disk at a time.

Clear as mud?

Technically, the Bloom 2 Bar Project ended (at its most generous) May 15.
I will however, continue to cross post items from my regular blog (Hammered Out Bits) here, for topics directly related to the theme of bloom into bar - and beyond.

Sunday, April 29, 2012

Inspiration to Modification

Day 62


Remember these?


F- 'Split Fire Riser'
R- 'Solar Riser LH4'
Thomas Patti - 1943
(Sorry - its a horrible image)

When I saw these glass objects by Patti at the Corning Glass Museum, I immediately thought of how the hydraulic press could alter the shape of a block of steel in a similar way.

So this is what became of the concept (Very, very, first rendition)


The left corner is the result of the very first experimenting with the press day I did with David Robertson. (David had consulted heavily with me on the construction of the press before this OAC project begain.)
The tool was originally produced for potential use with my small air hammer. I never use secondary tools that much with the air hammer, primarily because of the small die surface (as repeatedly mentioned, only 1 1/2 " wide by 4 " long). Although it is true that lack of practice is part of that problem! It has a slightly tapered shaft forged from 1 1/4 ' round stock, so the working end is roughly 1 inch diameter. The shaft length is roughly 3 inches, made of mild steel. The handle is piece of flat stock, wrapped around and MIG welded on the top surface, then ground flush.

The starting block was a piece of 1/2 thick by  roughly 2 inch square.
The resulting shape was made by setting the tool on the orange hot block, then driving it downwards. I used the full power of the press (to 3000 psi), primarily to see how far through I could push the tool.
As you can see, what happened is that the tool 'bottomed out' at about 3/16 thickness. At that point the metal below the tool had most of its heat pulled off through contact with the tool and bed of the press. The increasing pressure then simply started to bend the shaft itself.


Obviously not the way to go. Interesting potential however.


The second test , at the upper right, (done April 17) started with modifying a tool. This small (cheap) ball peen hammer had been used for a different impression test initially. Result was that the pressure collapsed the walls of the eye around the original wooden handle. First I used a drift to re-open the eye and straighten the bent head. The hammer face side was forged down to approximately the same shape and size as a standard 3/4 inch taper base candle.  Last I forged down a piece of solid 5/8 " round to fit, then drove that into the eye hot to seat it.
The starting block this time was a piece of 1 inch square, about three inches long.
First the hot block was collapsed downwards into itself. With a second heat, the tool was pressed down into the block.
One unexpected result was that the ball top end actually left an impression into the mild steel top flat plate die set in the press. Not good. 


But the finished object? Closer, but still not quite.


Both tool and object prototyping continues...


Monday, April 16, 2012

Demonstrating the Aristotle Furnace

Day 54


This video clip was shot by one of the participants at my March 10 demonstration at the monthly meeting of the Ontario Artist Blacksmith's Association (OABA, through the work of editor Sean Stoughton, regularly posts video on to its own YouTube site. )
The sound quality is uneven, and as hand held footage is a bit jumpy. The beginning explaination is missing, but if you stick with the clip, you will mostly get the sense of how the small re-melting furnace works.

For more info, download a handout at: http://www.warehamforge.ca/ironsmelting/Aristotle-HO.pdf

An earlier description of this demonstration was made here on B2B : March 11 - the Aristotle Furnace


Saturday and Sunday this weekend were spent taking part in a presentation by the Dark Ages Re-Creation Company at the Royal Ontario Museum. The ongoing experimental iron smelting work was part of the presentation. Although strictly not part of the B2B project, reference to the OAC was made (via a sign).

Friday, April 13, 2012

Forging a Copper Tuyere

Day 54

This is a note of the work undertaken on Wednesday April 11 (Day 52).

Lee Sauder had this to say about his use of a copper tuyere:
1) The original inspiration to try the copper came from the Catalan furnace descriptions. I tried it the first time I tried the flue tile, after the first Early Iron at Cooperstown, so I guess that would have been late ‘04 or early ‘05. I have used them almost exclusively since, with the Coated Tyle furnaces, the Cadhinos, the big steel and refractory Aphrodite, and all the clay furnaces.
2) I have found that they will melt if they are much less than 14 inches long (this is with about 2.5 inches protruding into the furnace).
3) I looked back through my notes, I think I used the last tuyere for 45 smelts before I retired it, but I’m not sure. It didn’t fail, it was gradually thinning, and I didn’t trust it anymore.
I had made a first attempt to try out a copper tuyere for my own smelts # 7, #8, # 12 in 2005. My problem was at the time I did not have suitable copper material to work with. I had tried cutting and forming from 1/8 inch thick copper sheet. That thickness just was not enough to either withstand the furnace temperatures or transmit heat off fast enough to prevent erosion of the tip. Work with copper tuyeres was abandoned in favour of using a standardized ceramic tube (starting in 2006).

Last year at Quad State, I had picked up a large bar of copper, 2 x 1 1/2 x 12 inches. (Luckily, I paid less than current scrap prices = $20.) I had actually intended this material for an artistic forging project, but like many good intentions, the piece got tucked away and pretty much forgotten.

With the reminder caused by the slag rings recovered at Smeltfest this year, and wanting a break from the heavy forge work this week, I pulled that block out. The starting weight was 4358 gm.
The first step was to combine draw, widen and flatten the material to a rough flat bar. This was done under the air hammer - mainly 'pushing' the material under the dies. (Starting at the far end, and pushing the material back towards the tong end as the dies collapsed it.)
Copper is wonderful material forge! It is extremely soft at a dull red colour, and even when the temperature drops, it remains soft and workable. This softness also means less vibration shock back into your hands. The big problem is heating a large piece. Heating in the propane gas forge, I was never able to get it much more than a 'bright red'. The end of the material hanging out of the forge was radiating off heat almost as fast as the burners were applying it.


After the initial flattening
(sorry for poor image quality)

At the end of the first stage, I had a flat bar roughly 1/2 inch thick, 3 inches wide, and about 20 inches long. You can see most of the thickness had been transferred to length, working on the flat die on the air hammer. In the image you can see how I cut off the last 4 1/2 inches (955 gm) of material.

The remaining piece was forged to a taper, both in thickness and width, over its length. This was done in a number of steps. Initially the material was worked by placing it to 90 degrees to the long axis of the dies. Next the surface was worked under a Hoffi style crowning top die. This was followed by a fair amount of working the surface with the cross peen. Again the direction of the peening was done at 90 degrees to the long axis of the material. The net effect here (for the non blacksmiths) is to primarily force the material side to side - not end for end. Last, the surface was worked with the forging hammer to smooth out all the irregularities caused by using the peen on such soft material. At this point the edges were also hammered to create a more or less even and straight lines.

This all created a shape like a triangle with the tip cut off. To finish the work, the peen was again used, but now over a half cylinder shaped anvil tool. Also it proved just as easy to work into the hollow created by the step from horn to face on the right hand edge of the anvil. This series of more gentle strokes gradually formed the flat surface into a half curve. This was carefully rolled up to where the two edges met - creating a conical form.
This was then worked to ensure the shape was symmetrical, and straight.


Finished copper tuyere

The resulting tuyere is 45 cm long. Its finished weight is 3394 gm.


Furnace End
2.5 cm internal diameter
wall thickness 6 mm


Air Input End
5 cm total diameter (accepts standard 1 1/2 inch threaded pipe)
wall thickness 3 mm

Saturday, April 7, 2012

Listening to the expert


If there is one name you will see over and over here, its Lee Sauder.

Lee, working with his smelt partner Skip Williams is most certainly the single most experienced bloomery iron worker in North America. I'd lay money he's the best counting the Europeans too. He is one of the other core driving members of the recent 'Early Iron' movement. There is no doubt that had I never met him, I would have given up on my own efforts to understand Norse iron smelting years ago.

Bearing in mind yesterdays long description of a working series with a bloom (and what went wrong) here is a link to what Lee has written as advise on the process :

Sauder's Bloom Forging Hints

If any readers wish to ease into working with bloomery iron, but are uncertain about plunging right into furnace construction (and the uncertainties of iron smelting), Lee also sells partial bloom sections and worked up bars :

Bloom Iron Sales

Home Grown, Organic, Free Range Iron Fresh from the Furnace!


Friday, April 6, 2012

A typical work session...

Day 49

Two things define a typical 'project day'.
First, there is the mornings, normally spent at my desk on the computer. This covers normal communications, business record keeping, research, - and preparing, writing and laying out blog postings (like this one).
Second, there is an afternoon session in the shop. This includes equipment set up - and actually working at the forge.

What that might look like? (1)

I have been trying to document all the ongoing work on the project. There was time spent cataloguing all the blooms, fragments and partial bars from a decade of iron smelts. There is normally also photographs and records kept on the finished bar produced on a specific work session. I've also been trying to keep the camera handy to take images of specific aspects of the ongoing work. Now and again I try to take enough images of the whole session to document the entire process of bloom to bar, set by step (2).
Now this is not exactly easy to accomplish, being both worker and photographer at the same time. Working the metal is very time dependant, specific heats being required for various processes. The camera also 'sees' deeper into the infra-red than the human eye, so records things much differently than what you might see if you were standing in the shop. Another problem is capturing a crisp image in the dim light necessary in the workshop. Flash images are crisp, but at the cost of washing out the visible colour of the hot metal.

So, this is what I did on the workshop session on Thursday April 5 ...
(click on any image for the full sized version)

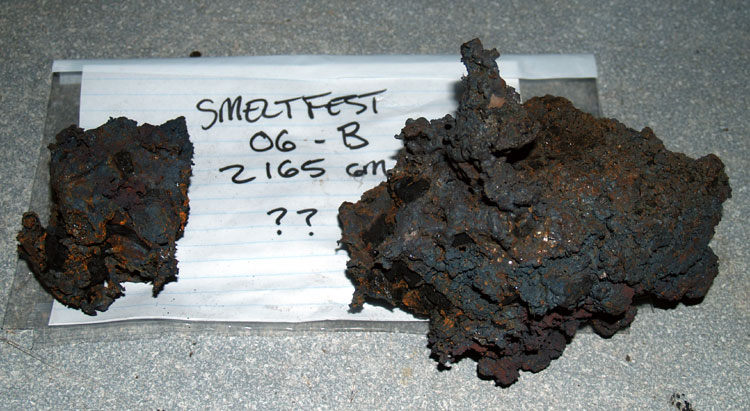
Bloom - Smeltfest 2006, Smelt B
Ore - Granular Hematite
Furnace - Medium shaft, standard set up
Starting Weight - 2165 gm
Bloom Condition - somewhat granular, likely mid carbon content
Objectives - 1) Working with a larger sized bloom
2) Creation of large plate with intentionally ragged edges (for use creating a bowl form)

Error Number One I have been looking up the details of the bloom composition AFTER my working sessions.
I should have taken more care on selection of the base bloom for the specific objective (!) The higher carbon blooms are naturally more likely to fragment when working, and are not the best suited to the specific purpose in mind here.


On examining the starting bloom, it was seen there was a fragment on one end only loosely attached. This piece was worked loose and set aside for later processing. The larger piece remains was weighed to 1770 gm.


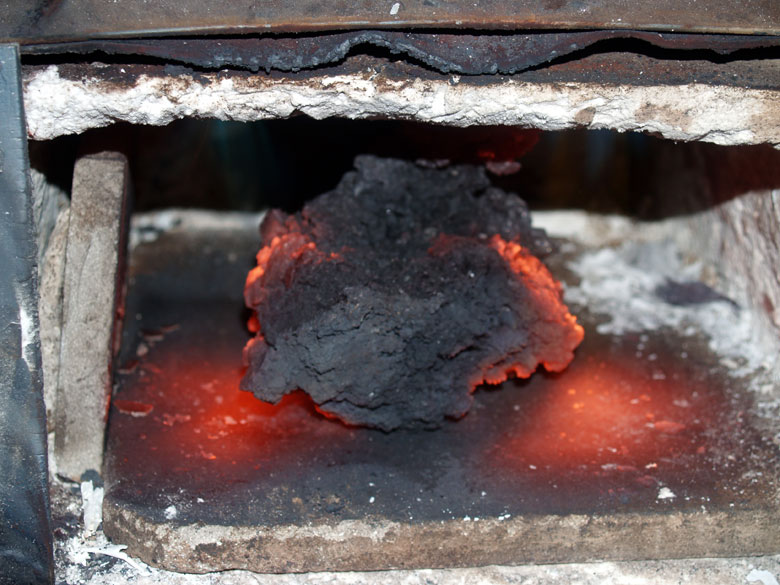
This piece would still fit into the double burner propane forge for pre-heat. The shot above is taken just after the forge itself was lit, so you can see the internal chamber itself has not come up to operation temperature.
The more important function of using the gas forge is to allow for a generous heat soak period - to ensure that the heat has penetrated through the whole mass. This continues while I am setting up the coal forge for the work session. This normally takes about 30 minutes to clean, screen, light and get through the coking cycle into a correct condition for forge work.


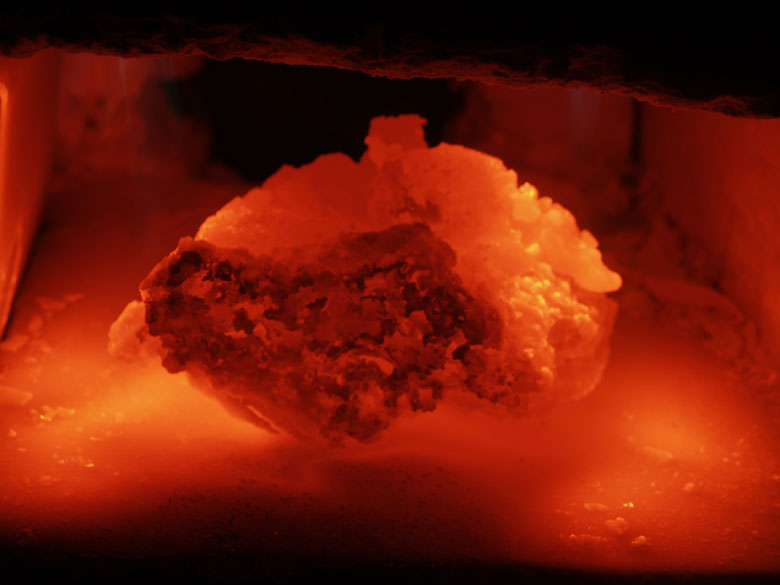
This is the condition of the bloom after 20 plus minutes heat soak. This propane forge will at best produce a 'bright orange to almost yellow' heat level. Although this is fine for general forge work, it is not quite hot enough to weld.
So now that the coal forge is ready, I transfer the bloom over to the (much hotter!) coal fire.


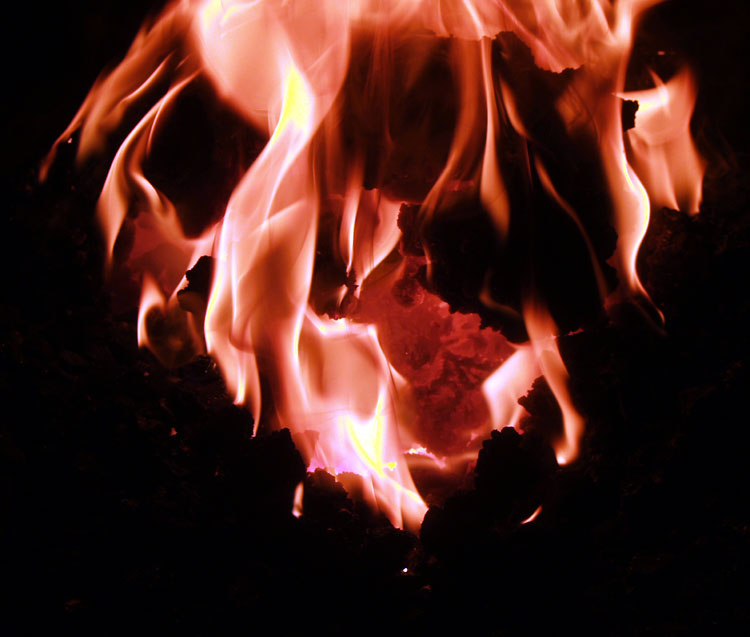
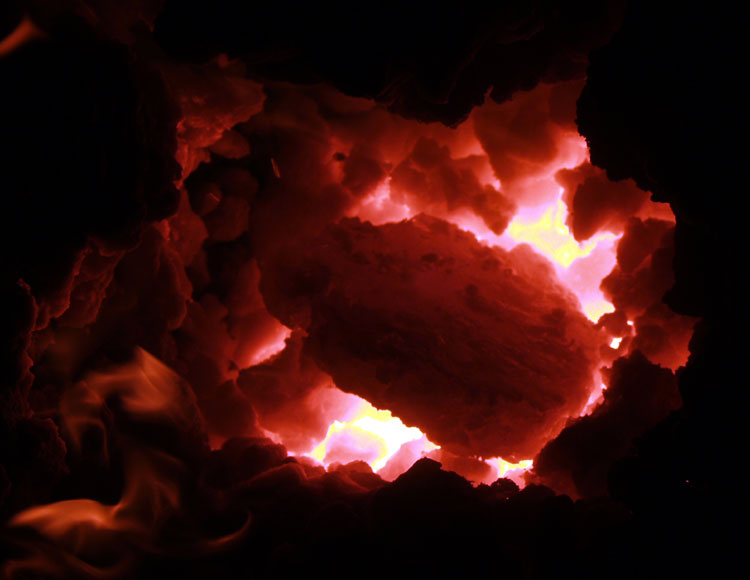
In this available light image, you get some idea of one of the first problems, which is simply fitting a bloom mass of this size into my existing coal forge - and effectively heating it. My fire box is a fairly large one, roughly 9 x 7 x 6 deep. I can easily get the *depth* of fuel for a hot fire. The problem is getting even heat around both edges of the large bloom mass. The forge is set up with a standard bottom blast, which means the primary heat direction is from the bottom as well (watch for this and its effect later).
Care is taken to increase the heat of the mass relatively slowly. The piece is constantly turned and flipped so there is the best chance of getting the whole mass to an even temperature. The intent is to get the mass up to welding temperature for the compression phase.

The first forging steps are carried out on the hydraulic forging press:


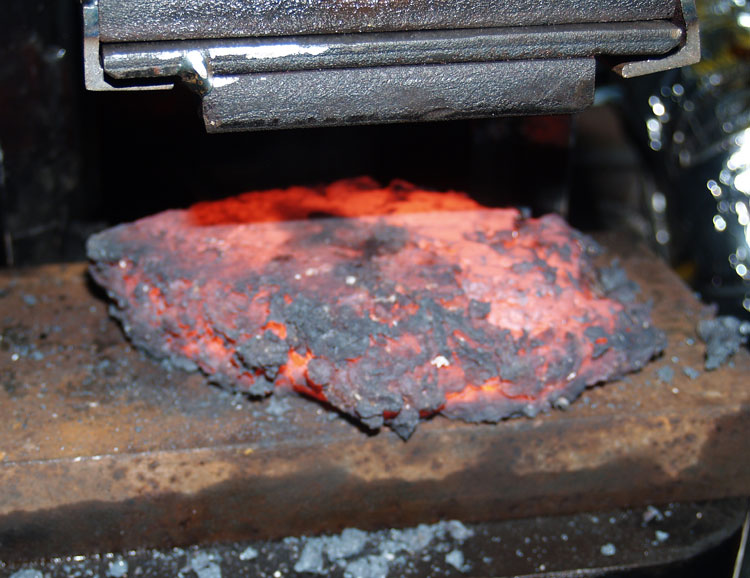
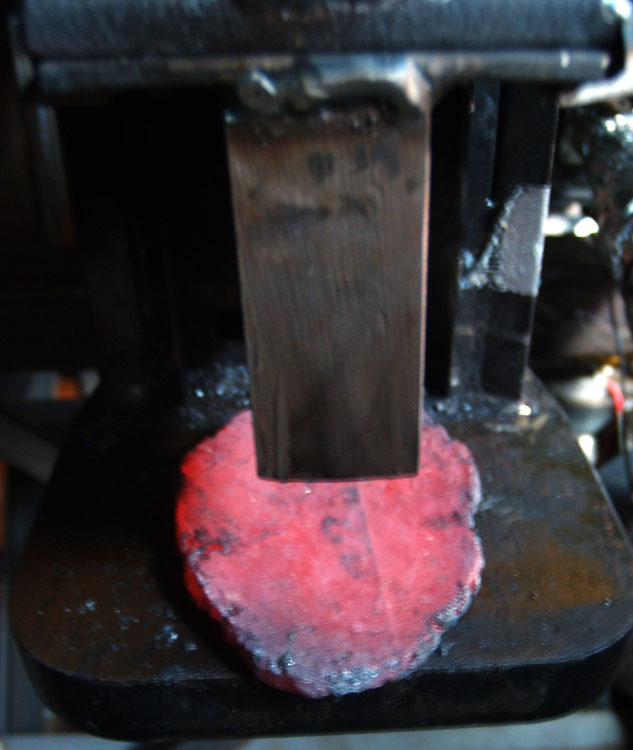
The first compression uses the larger flat plate die, also with the larger full sized bottom plate. The bloom is compressed along its natural top to bottom axis, with the flatter (top) side placed down. With quick work, it is then flipped and compressed again. At this point the 'cake' is roughly 3/4 inch thick, and still very ragged, especially on the edges.
The huge advantage of the press is that it is *squeezing* the often fragmented bloom mass together, rather than *pounding* it, as would be the case using my air hammer. This is especially important when working up the more granular higher carbon blooms. (The hematite blooms are almost like solid pieces of brown sugar in texture.)


The cake is placed back into the coal forge and brought up to welding heat again. Now the more compacted shape makes for more even heat penetration into the centre. At this point the piece is not so large that there is not fairly even heat distribution from the top and bottom of the fire.


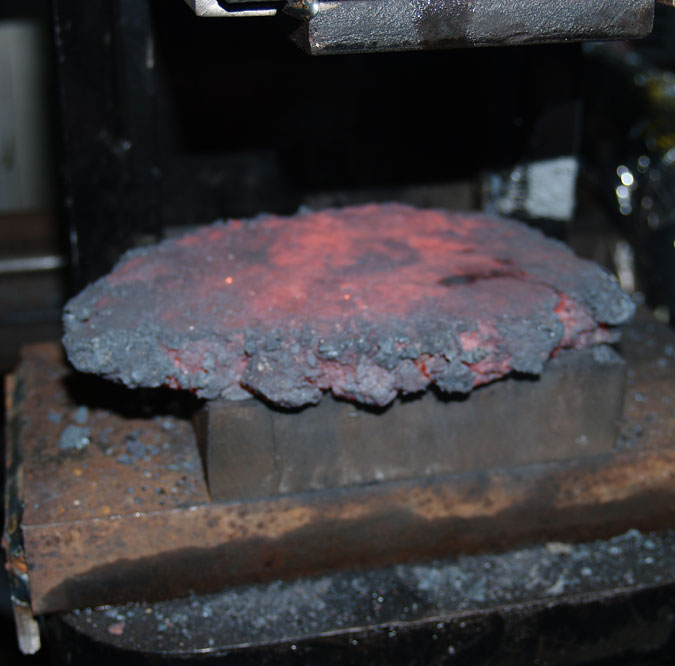
Taking into account the action of the press, a second bottom plate is added. The cake is compressed down closer to 1/2 inch thick.

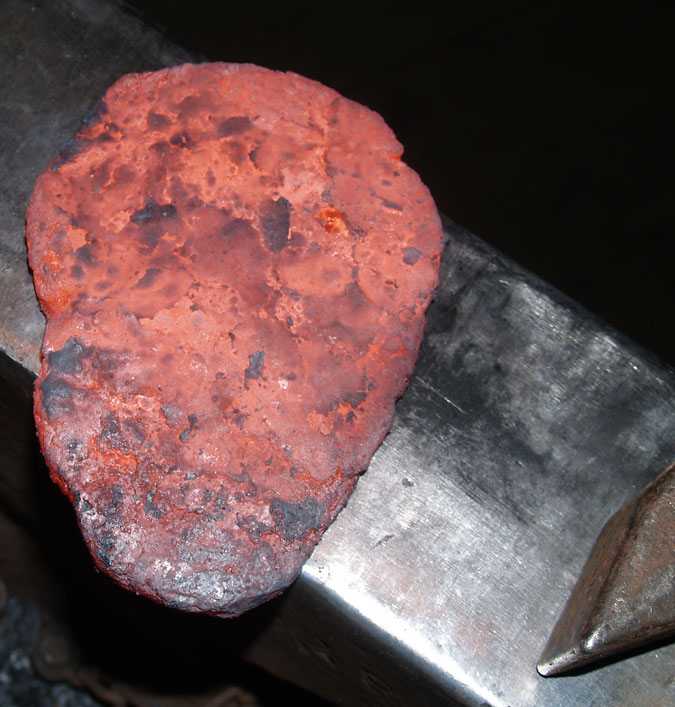
Back to the forge for another series of welding heats. This work is done with the hand hammer at the anvil. The ragged edges seen in the photo above are gently welded in towards the centre. This is done about 1/4 of the circumference at each welding heat. (A total of 5 heats were taken here)


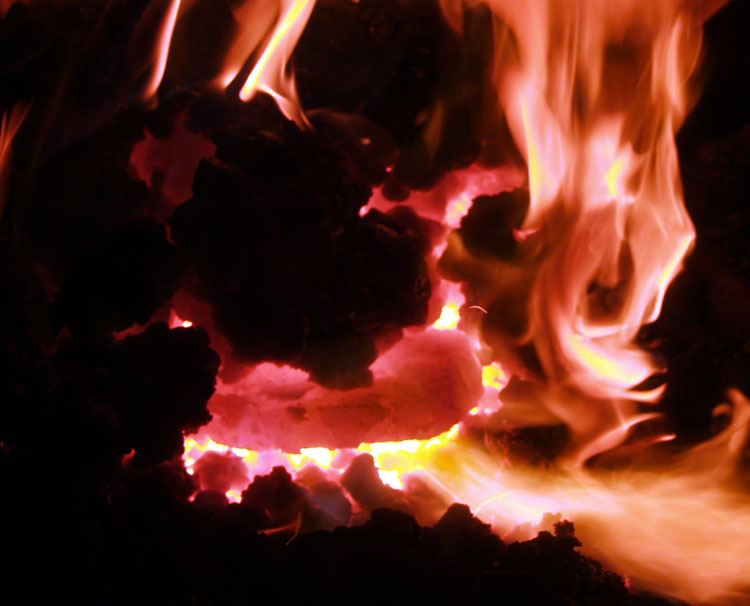
This shot is heating prior to the last compression step. You may spot a developing problem. The size of the plate is now large enough that it effectively blocks the air blast from the bottom of the forge, not letting enough oxygen into the top layer of fuel. There is now a very marked difference in the heat being applied to the bottom surface, compared to that on the top.


The narrow 'slot' die has been placed on the press. The surface of the plate is worked over (total three compressions on the first side, four on the second). At the end of this step, the plate has been reduced to about 3/8 thick.


(there is a gap in the images here)

Next the work shifts over to the air hammer. The plate after compression is a rough oval. As the intended application is for a bowl, a more symetrical shape is desired. For that reason, the placement of the piece on the air hammer is with the long axis of the dies running the same direction as the long axis of the metal. Due to the combination of metal size and small die size, only one half of the metal can be worked at a time. So there are a number of heat / work cycles required. An attempt is made to start each cycle back up to welding heat.

Error Number Two Remember that higher carbon metals are *much* more prone to overheating.
My attention got pulled away (by something) and I ending up letting the thin plate get drastically overheated at one point. The fire itself also was starting to perform less consistently (3).


The end result here was that I ended up burning out a small chunk of the plate. As well there were some serious flaws / cracks running through one side of the surface.


Sometimes you just have to know when its time to switch gears.
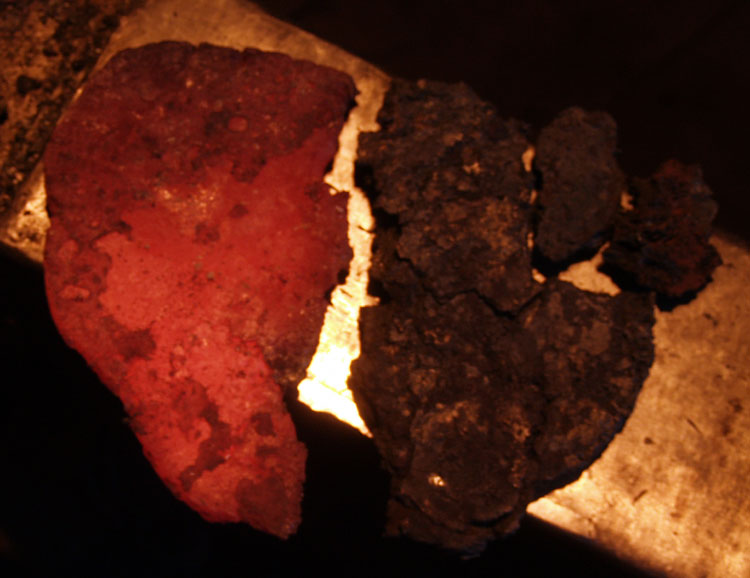
With almost all the damage on one half of the plate, I used a hot cut to divide the plate into roughly two half sections. The slightly larger piece, now at roughly 6 x 3 1/2 x 1/4 inch thick (684 gm), looked solid enough to continue working down towards a possible (smaller) bowl later.


The major cracks on the other section were used like score lines to break up the piece. This piece was roughly the same dimensions, but with the bite out of one edge, the weight was 463 gm.


These were combined roughly in the relationship seen here. The two larger fragments making the two outer surfaces, the smaller plus one little piece (broken off earlier) placed into the centre.


At this point I'm into a sequence that I have used a number of other times working up smaller bloom fragments.
The pieces are stacked, and tack MIG welded on one end to a mild steel bar and to each other. There is a total of 499 gm of bloom material. (This time I remember to weigh the handle separately!)


I've had a bit of a break, considering how to continue and cooling pieces to weigh and record. I also pull the bottom of the fire apart to clean it, and set up a new coke 'cavern' for proper forge welding. This is also much more familiar territory for me - a process much like I employ for layered steel. First there is a light fast hand weld to secure the pieces. This is followed with a heavier series of hand welding to make sure the pieces are well solidified. Although it is true bloom materials can contain a lot of glassy slag, I figure adding a bit more flux (borax in my use) can't actually *hurt* anything. I take care to get the ragged edges in the stack folded and welded in. Final compaction and drawing out is done on the air hammer.


The result is a small billet, roughly 1 1/2 x 8 x 3/16 inches. You can see that there is a prominent crack along one surface.


Deciding to work with the flaw, rather than against it, I use the hot cut to divide the billet along the crack. I had hoped to just score and fold (not normally what I do btw). The pieces actually separated. Perhaps not the absolutely wisest move, I decide to use a more 'japanese' technique - just balancing the two pieces in the fire and heating from the bottom. (Hey, it works for my friend Jesus Herandez...) Maybe a bit surprisingly, I manage to get a a good heat and successful weld. Under the air hammer, I work more aggressively *against* the last weld direction (so on the edges).


The end result of *three hours* is this finished small bar. Rough size is 5/8 x 1 x 4 1/2 inches at 357 gm.

Calculating the bloom to working bar loss is a bit rough here.
From bloom to cracked plate, the numbers are 1770 to 1223 = 69% return (so 31 % loss)
From plate pieces to bar the numbers are 499 to 357 = 72 % return (so 28 % loss)
Overall bloom to bar works out to 50% yield
(but bear in mind the material lost to that overheat)
(Thanks Neil!)


Notes

1) Important Note!
Remember that the purpose of the whole project is for me to accumulate some (necessary!) experience converting blooms into working bars, and hopefully then into objects. Obviously what I've documented here is very much a *learning process* and should not be considered the 'best' way to accomplish a given task!

2) One other aspect of these images : The original higher resolution images have been transformed via Photoshop into web format detail. Generally the image size has been modified to roughly 8 x 10 inches. This, combined with the various camera positions, makes the scale of the individual images vary considerably. Some images are shot with scales, so remember to use those to determine relative sizes. For the images shot on the anvil surface, the width of the anvil is 4 1/2 inches.

3) Lee Sauder uses a side blast set up when he works blooms. The clear advantage here is the the air flow comes in from one side edge (so spreads more evenly top and bottom over a cake or plate shape. More significantly, there is a lot of slag generated in the bloom to bar process. With a bottom blast, this material oozes to the bottom of the forge, effectively blocking part of the air blast. As this debris increases, the effect is to create hot jets of super heated oxygen. Effectively these act like small cutting torches inside the forge, which with poor attention (!) can have the effect of over heating (burning!) just part of the metal contained within the forge.


PS - Crunching the images, writing and formatting this essay has taken roughly three hours. I did need a bit of a break from a 'good week' at the forge. After lunch I'll get back out there and may have something to report on later!

If anyone is counting, today would be the 29th 'standard work day' on the project. Thats counting like it was normal days with weekends off.
In actual fact, according to my project diary, today counts as the 48th full day I've worked on the project.

You're getting your money's worth...

Sunday, March 11, 2012

the Aristotle Furnace

(Day 25)

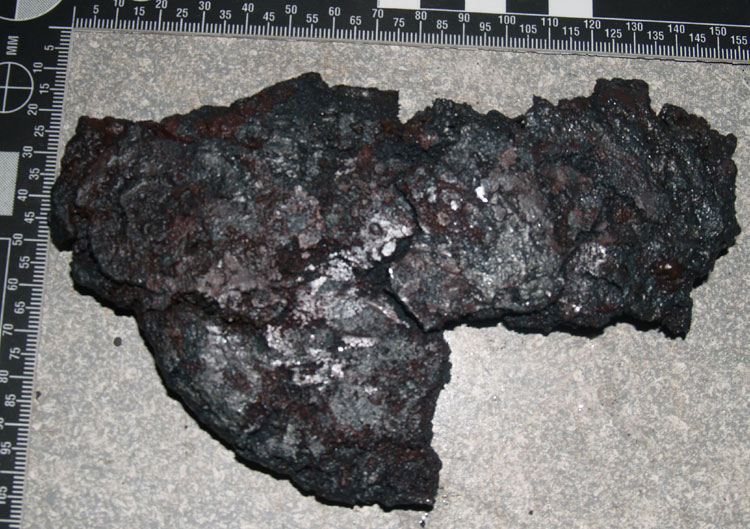
Yesterday I undertook a demonstration / hands on session at the monthly meeting of the Ontario Artist Blacksmith Association. I had been part of the team that researched the working system for a small re-melting furnace (Smeltfest 2009). This is a simple to build small furnace, economical and fast to run. It will convert almost any iron based material (scrap, alloy, carbon content) into a small puck of bloomery like material with a mid to high carbon content. This allows someone to experience the unique textures of bloomery iron - without the effort and expense of a full sized iron smelt.

After an overview and demonstration of the process, I invited individual participants to run a furnace cycle and produce their own puck of metal. Seven individuals took part - with excellent results every time! The blade smiths gathered where particularly interested, as the application to their work was obvious.


Observing the furnace, near the end of a cycle.
Both these fellows would take turns making their own 'puck'.

I had prepared a short handout to distribute. As travel, timing (and luck) would have it, I was not able to get photocopies made in time for the demonstration. The handout is duplicated below. It will also be available as a PDF download. (Links will be placed on my regular blog, my iron smelting web site, and the OABA web site.)


The Aristotle Re-Melting Furnace


A simple way to make bloomery type carbon alloys

This furnace is based on the writings in Aristotle's "Meterologica' and later Ole Evenstad's descriptions in the 1780's.
The original concept belongs to Skip Williams, who then introduced a prototype to the Early Iron group a Lee Sauder's Smeltfest event in 2008. At Smeltfest 2009, our team concentrated specifically on the working dynamics of the Aristotle Furnace, with over 30 individual test firings.

The furnace is build like a miniature short shaft smelter. A standard 2 litre plastic pop bottle makes a good internal form. The ideal material for the walls is a 50 / 50 mixture of dry shredded horse manure mixed with powdered potter's clay.
A standard carpenter's pencil, or a piece of 3/8 rod is used to make the blast hole.
Critical measurements are :
1) the angle of the blast hole - at 20 to 25 degrees down from horizontal
2) the depth of the furnace floor below the blast hole - at 5 - 7 cm
3) height above the blast hole - at about 20 cm

A single firing consumes about 2 kg (standard galvanized pail) of charcoal over 25 - 30 minutes. The fuel should be broken to 2.5 cm or smaller, with dust screened out.

Temperature is determined by consumption rate, in turn modified by volume of the air blast. Ideal consumption is roughly 200 gms every 4 - 5 minutes (determined by timing a standard measure - a standard coffee holds about 200 gm)

The raw material can be almost any iron source. At first it is suggested that short lengths of standard 3/8 - 1/2 mild steel bars be used. Cut this into roughly 15 - 20 cm lengths, a total of 600 - 800 per firing.

Each bar is placed roughly 1/3 the distance back from the blast hole side, deep enough into the charcoal that the pieces hold it upright in place. The pieces are then allowed to descend as the charcoal level drops. Keeping the furnace full of charcoal, new bars are added as the previous ones drop below the upper surface. The last bar is covered with a last addition of charcoal, then the surface level is allowed to drop, burning the remaining fuel.

At this point a pointed hook can be inserted underneath the 'puck' of collected bloomery steel. It is a good idea to scrape out any slag that has gathered in the bottom of the furnace, then the whole can be re-filled with fuel for an additional process.

The result is a mid to high carbon metal, with the physical texture characteristics of bloomery iron. The created 'puck' typically weighs about 500 - 600 gms (65 - 75% yield). Once consolidated, this enough material to make two 4 - 6 inch long tanged knife blades.


Descriptions and further reading on the Web:

"Teeny-tiny Bloomery"
by Skip Williams

"A different way to make steel"
by Jesus Hernadez (on 'Don Fogg's Knife Forum')

Aristotle's Steel

by Lee Sauder (PDF download)

"Steelmaking in a tiny open furnace"
Donald Wagner (This is a photo essay from the same event that Lee's article above was based on.)

Part of the OAC Crafts Projects Grant

Friday, March 9, 2012

Aristotle Furnace - Demo / Workshop

March 10, Ontario Artist Blacksmith Association, Guelph Ontario


'Building and Operating the Aristotle Furnace' - Darrell Markewitz

This will be a practical demonstration and participant workshop session held as an additional part of the regular monthly meeting of OABA. The Aristotle Furnace was first introduced by Skip Williams at Smeltfest 2008 and further refined during Smeltfest 2009. It is a small table top re-melting furnace which easily allows the production of a small cake of bloomery type metal - ideal for bladesmithing. It will convert any scrap iron material into a roughly 0.5% carbon metal, but with the stringy slag inclusions of a 'wrought iron' type. Each operation cycle consumes roughly 2 kg of charcoal over about 25 minutes, yielding a mass roughly the size of a hockey puck.

Lee Sauder working with an Aristotle Furnace - Smeltfest 09

Darrell will demonstrate the layout and working of the furnace, and provide enough materials for a number of people to actually try making their own 'pucks' (as time permits).
This demonstration is offered as part of his current 'Craft Project - Creation & Development' Grant via the Ontario Arts Council - Government of Ontario

Tuesday, March 6, 2012

You Can't Always Get...

...what you WANT
(But if you try some times...)

(Day 20)

This is a look at what happened yesterday in the forge.
If you check back to yesterday's posting. You will see that the concept I had come up with was to take one of the smaller, more compact looking blooms and layer it up on to a carbon steel core. The intent was to preserve the ragged edge into the finished object.


The bloom I chose for this was the one from Smelt 14 - at Dan Nickel's 'Folly at the Forge' event. (Black Rock Forge - Traverse City MI, February 2006. The story of that smelt is an interesting tale of endurance, it was 20 bellow F when we started!) The piece was a fragment at 485 gm off a much larger bloom. As we had forged down the full bloom to bars at the event, I knew the material was a 'nice workable iron' (from my notes).

As it was about fist size to start, it easily fit inside my two burner propane forge to pre-heat. This allowed me to bring the core up to temperature more slowly. Also allowed this process to take place while I was getting my main coal forge set up and started. All the actual forge work was done in the hotter coal fire.
(Note that I have altered this image in an attempt to get it closer to the actual colours you would have seen. The camera 'sees' down into the infra-red differently than the human eye does. The actual colour would have been a 'bright orange'.)
This is the end result of the initial flattening stage. I worked the raw bloom starting at a welding heat. I took two heats working with the hand hammer, concentrating mainly on the flatter of the rectangular sides. Then I took several heats on the air hammer, again starting with welding each time. The action there was primarily to draw the rectangle down to a wide and thin flat bar.
Here you can see the results after being cooled and cut into two fairly equal pieces. The loss from bloom to this stage (as you can see) was down to 394 gms

Thats a total loss of 91 gm, or about 20%.
The metal at this point still had some fissures in it, especially along one edge. If I was really trying to make a solid working bar, I would have collapsed the bloom into a square cross section, allowing me to work all four of the edge surfaces (instead of just concentrating on two). I would have undertook at least one more weld series. My estimate is that the total loss would have been closer to 25 %


The two bloom iron plates were roughly 1 3/4 inch wide x 3 3/4 long x 1/4 thick. I took a piece of standard 1045 middle carbon spring steel (new leaf spring) and placed it as a core. A working handle was MIG welded to the spring. I then tack welded the three pieces together at the far end. You can see that the central cut end of the bloom plates was placed at the far end.
(I normally wire together my starting layers. Also I like to weld from the far end back towards my body. Just habits!)
At this point there was a total of 643 gms of material, the stack was roughly 3/4 inch thick.You can see that the spring was a bit wider, at 1 3/4 inch. I left the plates all even on the 'cleaner' edge of the bloom pieces. (Remember a ragged effect was my initial goal.)


The finished result.
This billet is roughly 8 inches long (with the more or less pointed end) x 1 3/4 at the base x 3/8 thick. I have given it a fast surface clean on the high speed sander. Although there are certain to be some flaw lines, generally the surfaces are welded fairly tight.

Although this billet will certainly work up into a potentially quite nice blade, it is not quite 'what I need'.

Back to the pile for another attempt...

Sunday, March 4, 2012

Hold Me, Squeeze Me...

(Day 18)


Today's work in the forge was making up some special bloom holding tongs. If you click on the image above, you will see the spread of sizes at about half life size. The tongs are positioned so they are at their optimum size (ie - comfortable in the fist).
I had a large gap! The largest pair, antique hand forged wrought iron, hold about 4 inch diameter. The pair to the right (industrial, factory made) are set for about 1/2 inch diameter. This was just too wide a gap. You can see the new tongs (straight out of the slack tub in the photo) are set for roughly 2 1/2 and 1 inch material.
Working with Lee Sauder and Mike McCarthy on blooms at our yearly 'Smeltfest' workshop session, I certainly have learned that tongs with pointed tips give the best grip on the irregular surface of a bloom.

Although the new tongs I've made today are hardly elegant, I chose the particular style (contoured from rectangular bar stock) quite purposefully. Yes, although there is more drawing out to do (for the handle ends), in truth this style is easier to make than the more standard 'weld reigns to jaws' type. This more primitive tong also happens to be the type most typical of Viking Age tools. So I was looking ahead to some smithing work I hope to do with Mark Pilgrim at L'Anse aux Meadows NHSC - when DARC presents there this July.

February 15 - May 15, 2012 : Supported by a Crafts Projects - Creation and Development Grant

COPYRIGHT NOTICE - All posted text and images @ Darrell Markewitz.
No duplication, in whole or in part, is permitted without the author's expressed written permission.
For a detailed copyright statement : go HERE